3D Folder Menus
The Sheets control bar will display a secondary level entry for all displayed 3D views, for example.
Each section can be expanded to reveal a set of data-type specific folders, which can in turn be expanded to display the available overlays of that data type. Each level of the menu provides context-sensitive menu entries. See Sheets | 3D Folders.
Right-clicking a view-level icon reveals commands that will be applied to all overlays (of all data types) that reside within that view. For example, you can enable or disable clipping, or apply a display filter to all overlays in the view at once. This is useful where you need to isolate a particular category of data, say, the drillholes, block model and wireframe of a particular shear zone in a resource modelling case study.
To make view-specific changes:
- Display the Sheets control bar.
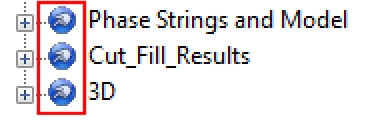
- Locate the relevant view item. If you are only displaying the default 3D view, it appears as "3D".
-
Right-click the view item to reveal a menu.
-
To generate a new overlayof any currently loaded 3D data object:
- Select Create from Loaded Data.
- A list of all loaded data objects (all data types) displays.
-
Check all objects from which you wish to create a new, default overlay.
Note: 3D Overlays are generated using the settings of the default template for each data type.
- Click OK.
- A new overlay will appear in the respective object data type folder(s).
-
To enable or disable clipping in the view, that is, apply or ignore the current view clipping settings as displayed on the 3D View ribbon:
-
Select Clip All to apply the current clipping settings to all visible overlays of the view.
-
Select Clip None to disable clipping in the selected view.
-
-
To hide or show all loaded overlays of the view:
-
Select Show All to enable the display of all available 3D overlays in the view.
-
Select Hide All to disable the display of all overlays in the view
Note: This emulates the checking and unchecking of overlay items in the lower menus,
-
-
To redraw the contents of the 3D window, select Redraw All.
-
To apply a previously saved Quick Filter to all overlays in the selected view:
-
Expand the Apply Filter menu.
-
Select a previously saved filter description.
The filter applies to all overlays in the view. If the filter references attributes of loaded data objects, a filter is applied to all corresponding 3D overlays of those objects.
Also see Quick Filters - Examples
-
-
To remove all overlays from the selected view:
Warning: Use this option with caution as it cannot be undone.
Related Topics and Activities
- 3D Window Visualization
- External 3D Views
- Independent 3D Windows
- Views, Sheets and Overlays
- 3D Window Templates
- Sheets | 3D Folders
- Sheets Control Bar
- Quick Filter Control Bar
- Quick Filters - Examples